Cute Japanese Roll Cake

Blogging is still a very new thing in my life, I hope i could post more often. However, I've been quite busy with my work and had not been able to write any post since my last post on November 2012. Recently, beside cooking I had also acquired some interest in baking as well. I learned my skill in baking from watching video posted in YouTube and also by reading many of the talented cooking blogger's posts. The more i watch and read the blog's the more i feel like i want to bake. OMG!! will i gain more weight from this new hobbies of mine???
I had come upon a video of how to bake a Japanese Swiss Roll with cute drawing on the cake. Without any delay i try to find the recipe online and found it from Reese Kitchen blog. I had tried to bake this roll cake with few others recipe but find her cake texture is the one that i like most.
Since I'm still an amateur in baking, i did not make much changes from her original recipe. Here it goes, hope you like it:

Egg yolk Batter (Ingredient A):
6 Egg yolks
20g of Caster sugar
100g of Red Rose Flour
15g of Corn Flour
60g of full cream milk (Fresh Milk)
45g of Corn Oil
1 tsp of Pure Vanilla Essence

Egg Whites:
6 Eggs whites
70g of Caster sugar
Few drops of color for drawing.
(I'm using brown color)
Strawberry Yogurt Filling:
240ml / 1 cup of Cold UHT Whipping Cream
(Called as heavy whipping cream)
1 tbs of Caster Sugar
1 tsp of Pure Vanilla Essence
135g of Cold Nestle Fat Free Strawberry Yogurt
Some fruits of your choice. I'm using fresh strawberry's only. Dice to small pieces.
Method:
Before we start, choose some cute drawing of design that you like to be seen on top of your cake. Print it out on a
piece of paper. The size should be the same size as the base of your cake mold. I had drawn a
Mickey Mouse symbol as my cake design. Place your design at the most bottom of the cake tin and line the cake tin with waxed paper (I'm using 10" square cake tin). Make sure you would be able to see trough the design you had prepare. Preheat the Oven to
180C.
Strawberry Yogurt Filling
To make sure that the whipping cream will form well, we need to used a cold bowl and a cold whisk as well. For myself I had place my glass bowl and my whisk in the fridge a day before i baked. Also make sure all your ingredient is also cold.
- Attach your electric mixer with the cold whisk and in the cold bowl, combine the UHT Whipping Cream, sugar and Vanilla essence. Start beat the cream with slow speed to avoid your cream from splashing out and may increase the speed to medium high speed when the cream start to hold its shape.
- Continue to beat till you see the cream starting to leaving a track when you whisk it. This mean the cream is starting to stiff up. Add in the Strawberry yogurt and continue to beat till it mix well.
- Try to have a taste, if it's not enough sweet you may add a bit more of sugar.(This is really depends on your preference)
- Beat the cream until it forms a soft peak. Pour it out to a small bowl and put it in to the fridge while we start to prepare the cake.
Sponge Cake
We need to prepare the egg york batter and the egg whites separately as we will only need to combine the mix after we finish our drawing on the pan.
Egg York Batter
- In a bowl by using the wire whisk, lightly whisk the 6 egg yolks and 20g of sugar till well combine.
- Add in milk, corn oil and vanilla essence and mix well.
- Sift in red rose flour and corn flour to the egg yolk and stir the batter till well combine. Set it aside.
White Egg
- With electric mixer, beat the egg whites and sugar until half soft peak. Set it aside
 Color Batter & Drawing
- By using an ice-cream scope, scope out 2 scope of egg yolk batter and 2 scope of white egg to a small bowl and add in the color you had prepare. Mix it well.
- Scope up the color batter in to a piping bag (mine was the plastic type). Cut a very tiny hole on the peak of the bag and start pipe on the wax paper following the outline of your desired design.
- Drop the cake tin lightly for few times on a table before put into the oven and bake at 180C for 1 min.
Sponge cake
- Whisk the earlier half soft peak egg whites till it form to a soft peak.
- Fold in the soft peak egg whites together with the remaining egg yolk batter with spatula until well combine.
- Spread the batter evenly on the cake tin (covering the half baked drawing).
- Again drop the cake tin lightly for few times on a table before put it into the oven. This is to raise the air bubbles our of the batter.
- Bake at 180c for 11 to 12 min (cooking time may be different depending on the heat of your oven)
Roll the cake
- When the cake is done and out from the oven, again drop the cake tin on the table a few times to prevent the cake from shrinking.
- Remove the cake from the tin by lifting the waxed paper and place it on a wire rack to cool down.
- After the cake had cool down, remove the waxed paper and transfer your cake to a parchment paper. The cake design should be facing down.
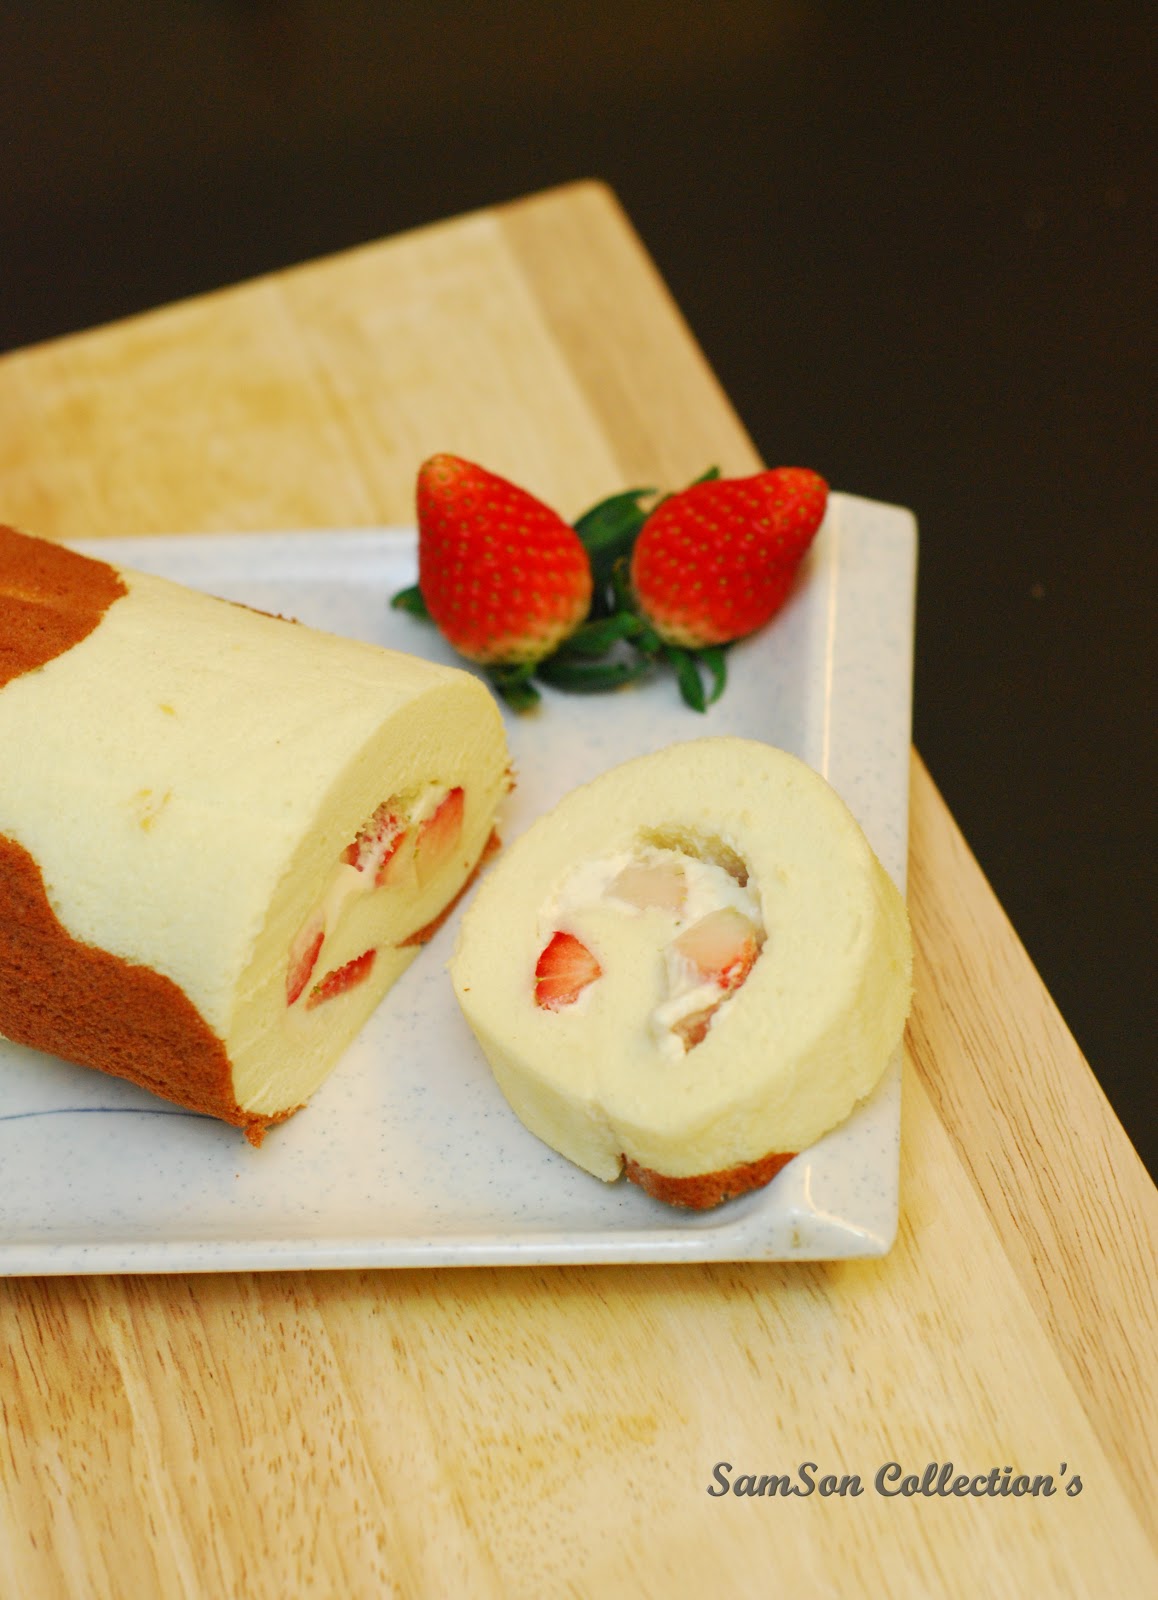
- Coat the surface of the cake evenly with the cream that we had prepared earlier. Place the fruits over the creamed surface.
- Roll up the cake with the help of the parchment paper and wrap it up. Place the cake in the fridge for at lease 30 min to set the shape.
- Cut the roll cake with your desired thickness and it is ready to be serve! Hope you will enjoy it!